As the warm sunshine beckons and the aroma of sizzling meats fills the air, it’s time to fire up the grill and embrace the art of outdoor cooking. Becoming a skilled grill master goes beyond merely flipping burgers and hotdogs; it’s about mastering a diverse repertoire of mouthwatering recipes that will impress family and friends at every gathering.
Grilling is a beloved cooking method that brings out the natural flavors of ingredients while infusing them with delectable smokiness. Whether you’re a seasoned griller or a novice looking to elevate your skills, this article will equip you with 11 must-know recipes that will solidify your position as a true grill master.
11 Classic Grilling Recipes:
| Recipe Name | Link |
|---|---|
| 1. Classic Grilled Steak | Go To Recipe |
| 2. Juicy Cheeseburgers | Go To Recipe |
| 3. Tender Grilled Chicken | Go To Recipe |
| 4. Mouthwatering Ribs | Go To Recipe |
| 5. Grilled Shrimp Skewers | Go To Recipe |
| 6. Flavorful Grilled Vegetables | Go To Recipe |
| 7. Smoked Pulled Pork | Go To Recipe |
| 8. Grilled Whole Fish | Go To Recipe |
| 9. Tasty Grilled Lamb Chops | Go To Recipe |
| 10. Grilled Pizza | Go To Recipe |
| 11. Succulent Grilled Pineapple Dessert | Go To Recipe |
From perfectly seared steaks to fall-off-the-bone ribs, succulent seafood, and grilled desserts, these recipes cover a wide range of dishes that cater to various tastes and occasions. But it doesn’t end there! In addition to the recipes, we’ll provide you with expert tips and techniques to enhance your grilling expertise. So, get ready to take your grilling game to new heights and delight your guests with an unforgettable culinary experience. Let’s fire up the grill and dive into the world of irresistible flavors!
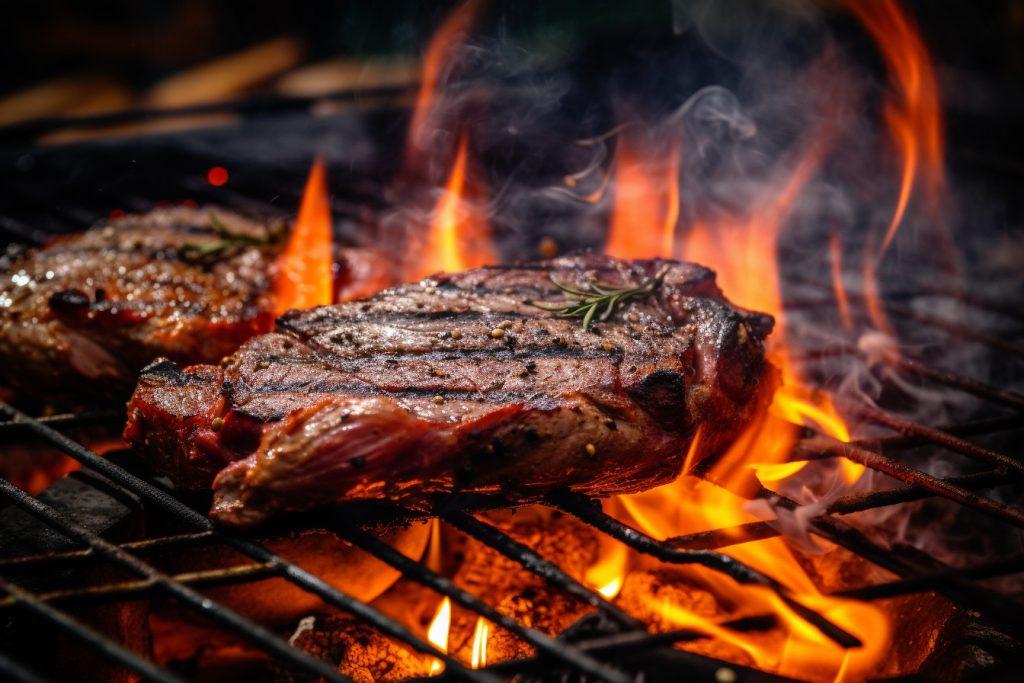
Classic Grilled Steak
Few things are as satisfying as a perfectly grilled steak with a delicious crust on the outside and tender juiciness on the inside. To master this classic, follow our expert tips and use the recipe below for a steak that will have your guests coming back for more.
Ingredients:
| Item | Quantity |
|---|---|
| Thick-cut ribeye or striploin steak | 2 (8-10 oz each) |
| Olive oil | 2 tablespoons |
| Kosher salt | 1 tablespoon |
| Freshly ground black pepper | 1 tablespoon |
Instructions:
Prep the Steaks:
- Remove the steaks from the refrigerator and let them sit at room temperature for 30 minutes before grilling. This allows for more even cooking.
Prepare the Grill:
- Preheat your grill to high heat (around 450°F to 500°F / 232°C to 260°C) for a good sear. If using a charcoal grill, arrange the coals for direct heat.
Season the Steaks:
- Brush both sides of the steaks with olive oil, ensuring an even coating.
- Generously season both sides of the steaks with kosher salt and freshly ground black pepper. The coarse salt will form a flavorful crust as it interacts with the high heat.
Grill the Steaks:
- Place the steaks on the hot grill and cook them with the lid closed for about 4-5 minutes on each side for medium-rare doneness. Adjust the cooking time based on your preferred level of doneness.
Check for Doneness:
- Use an instant-read meat thermometer to check the internal temperature. For medium-rare, aim for 130°F to 135°F (54°C to 57°C).
Rest the Steaks:
- Remove the steaks from the grill and let them rest on a cutting board or a warm plate for about 5 minutes. This allows the juices to redistribute throughout the meat, resulting in a juicier steak.
Slice and Serve:
- Slice the steaks against the grain and serve them with your favorite sides or sauces. Consider a compound butter or a drizzle of balsamic glaze for an extra touch of flavor.
Steak Grilling Tips:
- For a beautiful diamond grill mark pattern, rotate the steaks 45 degrees halfway through cooking on each side.
- Avoid pressing down on the steaks with a spatula while grilling, as this releases precious juices and can lead to dry meat.
- Invest in a quality instant-read meat thermometer to ensure consistent and precise cooking.
Now you’re armed with the secrets to grill the perfect steak. Experiment with different cuts and seasonings to create your signature dish. The art of grilling awaits, so get ready to impress with your sizzling skills!
Juicy Cheeseburgers
Juicy cheeseburgers are a quintessential crowd-pleaser that never fails to satisfy. With the right techniques, you can achieve burgers that are packed with flavor and irresistibly juicy. Follow our expert tips and use the recipe below for cheeseburgers that will be the highlight of any cookout.

Ingredients:
| Item | Quantity |
|---|---|
| Ground beef (80% lean) | 1 pound (454g) |
| Salt | 1 teaspoon |
| Freshly ground black pepper | 1/2 teaspoon |
| Burger buns | 4 |
| Cheese slices (cheddar, American, or your preference) | 4 |
| Burger toppings (lettuce, tomato, onion, pickles, etc.) | As desired |
| Condiments (ketchup, mustard, mayonnaise, etc.) | As desired |
Instructions:
Prep the Meat:
- Gently form the ground beef into four equal-sized patties, avoiding over-packing or excessive handling, which can lead to tough burgers.
Season the Patties:
- Sprinkle both sides of the patties with salt and freshly ground black pepper. Keep the seasoning simple to let the meat’s natural flavor shine.
Prepare the Grill:
- Preheat your grill to medium-high heat (around 375°F to 400°F / 190°C to 204°C) for optimal burger cooking.
Grill the Burgers:
- Place the patties on the hot grill and cook them for about 4-5 minutes on each side for medium doneness. Adjust the cooking time based on your desired level of doneness.
Add Cheese and Melt:
- During the last minute of grilling, place a cheese slice on each patty to melt and achieve that ooey-gooey goodness.
Toast the Buns:
- Lightly toast the burger buns on the grill for added flavor and to prevent them from becoming soggy.
Assemble the Cheeseburgers:
- Place the grilled patties on the bottom half of each bun.
- Add your preferred toppings and condiments to customize your cheeseburgers to perfection.
- Top with the other half of the bun, and your juicy cheeseburgers are ready to serve.
Cheeseburger Grilling Tips:
- For a juicier burger, consider using ground beef with a slightly higher fat content (80% lean works well).
- Resist the urge to press down on the burgers while grilling, as it squeezes out the flavorful juices.
- Let the burgers rest for a minute or two after grilling before assembling. This allows the juices to redistribute throughout the meat.
Get creative with your cheeseburger toppings and condiments to suit your taste. Whether it’s a classic cheeseburger or a gourmet masterpiece, your guests will be delighted with the juicy and flavorful results.
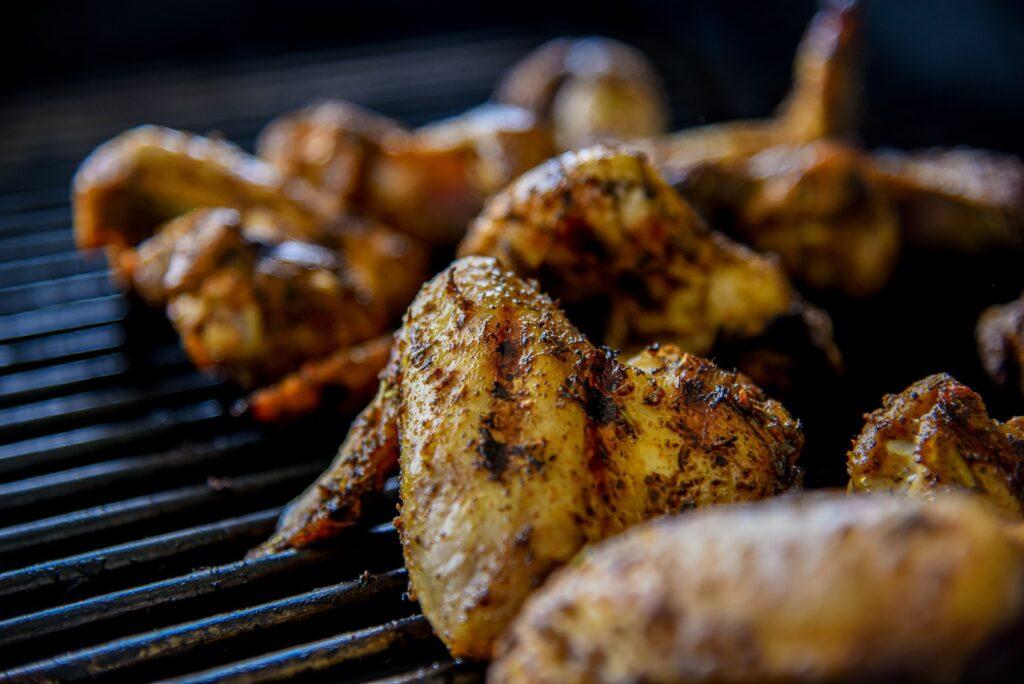
Tender Grilled Chicken
Grilled chicken is a versatile and healthy option that can be enjoyed in various dishes or on its own. The key to tender and succulent grilled chicken lies in proper preparation and cooking techniques. Follow our expert tips and use the recipe below to achieve chicken that is bursting with flavor and moisture.
Ingredients:
| Item | Quantity |
|---|---|
| Chicken breasts or thighs | 4 pieces (boneless, skinless) |
| Olive oil | 2 tablespoons |
| Lemon juice | 2 tablespoons |
| Garlic cloves (minced) | 2 |
| Dried thyme | 1 teaspoon |
| Paprika | 1 teaspoon |
| Salt | 1/2 teaspoon |
| Freshly ground black pepper | 1/2 teaspoon |
Instructions:
Marinate the Chicken:
- In a bowl, mix the olive oil, lemon juice, minced garlic, dried thyme, paprika, salt, and black pepper to create the marinade.
- Place the chicken pieces in a resealable bag or a shallow dish and pour the marinade over them. Ensure the chicken is evenly coated with the marinade. Marinate in the refrigerator for at least 30 minutes or up to 4 hours for maximum flavor.
Prepare the Grill:
- Preheat your grill to medium heat (around 350°F to 375°F / 177°C to 190°C) for a gentle cooking process that keeps the chicken moist.
Grill the Chicken:
- Remove the chicken from the marinade and discard the excess marinade.
- Place the chicken on the preheated grill and cook for about 6-8 minutes on each side, or until the internal temperature reaches 165°F (74°C) and the chicken is no longer pink in the center
Rest and Serve:
- Remove the chicken from the grill and let it rest for a few minutes before slicing or serving. This resting period allows the juices to redistribute, ensuring tender and juicy chicken.
Chicken Grilling Tips:
- For added tenderness, consider pounding thicker chicken breasts to an even thickness before marinating and grilling.
- Avoid overcrowding the grill, as ample space between chicken pieces allows for even cooking and better browning.
- If using bone-in chicken, adjust the cooking time accordingly, as bone-in cuts may take a bit longer to cook.
Whether you enjoy the grilled chicken on its own, in salads, or as part of a flavorful dish, this recipe is sure to impress with its tender texture and delightful seasoning. Elevate your grilling game and savor the flavors of perfectly grilled chicken!
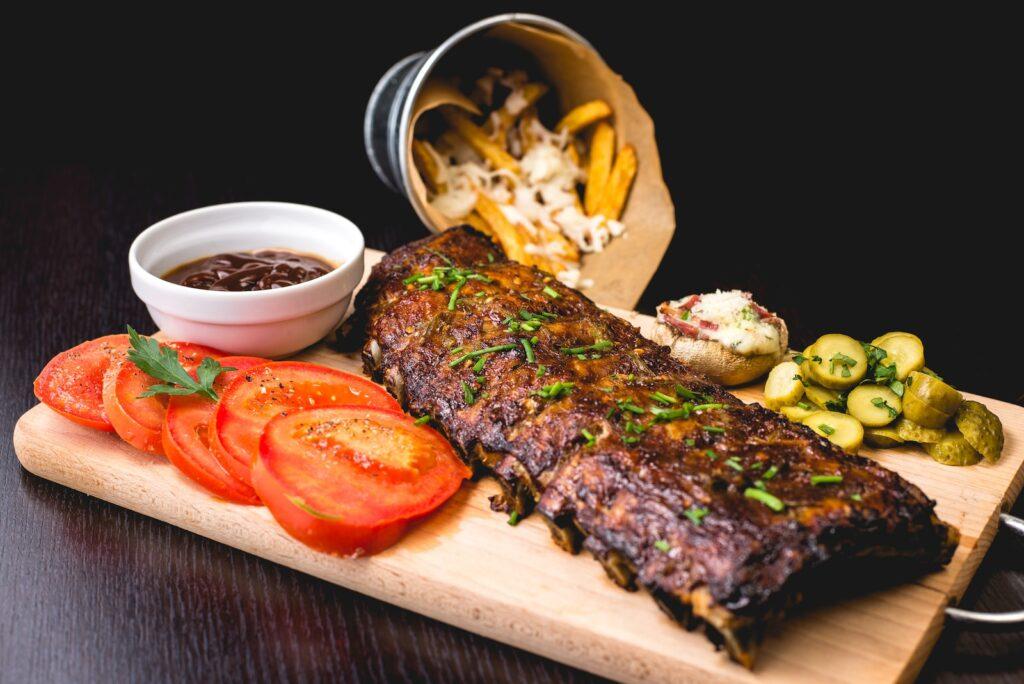
Mouthwatering Ribs
Mouthwatering ribs are a barbecue favorite that can be enjoyed with various sauces and rubs. Slow-cooked to perfection, they become tender and flavorful, making them a must-know recipe for any grill master. Follow our expert tips and use the recipe below to create ribs that will have everyone coming back for more.
Ingredients:
| Item | Quantity |
|---|---|
| Pork baby back ribs | 2 racks (about 2.5 lbs each) |
| Brown sugar | 1/4 cup |
| Paprika | 2 tablespoons |
| Garlic powder | 1 tablespoon |
| Onion powder | 1 tablespoon |
| Chili powder | 1 tablespoon |
| Salt | 1 tablespoon |
| Black pepper | 1 tablespoon |
| BBQ sauce (your favorite) | As desired |
Instructions:
Prepare the Ribs:
- Remove the thin membrane from the back of the ribs for more tender results. Use a paper towel to get a good grip and peel it off.
Season the Ribs:
- In a bowl, mix the brown sugar, paprika, garlic powder, onion powder, chili powder, salt, and black pepper to create the dry rub.
- Rub the mixture all over both sides of the ribs, ensuring even coverage.
Wrap and Refrigerate:
- Wrap the seasoned ribs in plastic wrap or aluminum foil and refrigerate for at least 4 hours, allowing the flavors to meld.
Prepare the Grill:
- Preheat your grill to indirect heat at a low temperature of 225°F to 250°F (107°C to 121°C) for slow cooking.
Slow Cook the Ribs:
- Place the ribs on the grill away from direct heat and close the lid.
- Let the ribs cook for about 3 to 4 hours, depending on the thickness of the ribs, until they are tender and almost falling off the bone.
Glaze with BBQ Sauce:
- In the last 30 minutes of cooking, brush the ribs with your favorite BBQ sauce, allowing it to caramelize for added flavor.
Rest and Serve:
- Remove the ribs from the grill and let them rest for a few minutes before slicing and serving.
Rib Grilling Tips:
- Use a drip pan under the ribs to catch the drippings and prevent flare-ups.
- Experiment with different BBQ sauce flavors to find your favorite combination.
With this mouthwatering ribs recipe, you’ll be able to achieve tender and flavorful ribs that will make you the hero of any barbecue gathering.
Grilled Shrimp Skewers
Grilled shrimp skewers are a delightful and quick option for seafood lovers. Whether you’re serving them as an appetizer or main course, these flavorful skewers are sure to impress. Follow our expert tips and use the recipe below to create shrimp skewers that will transport your taste buds to the seaside.
Ingredients:
| Item | Quantity |
|---|---|
| Large shrimp (peeled and deveined) | 1 pound (about 20-25 shrimp) |
| Olive oil | 2 tablespoons |
| Lemon juice | 2 tablespoons |
| Garlic (minced) | 2 cloves |
| Fresh parsley (chopped) | 2 tablespoons |
| Salt | 1/2 teaspoon |
| Black pepper | 1/4 teaspoon |
| Wooden or metal skewers | As needed |
Instructions:
Prepare the Shrimp:
- If using wooden skewers, soak them in water for about 30 minutes to prevent them from burning on the grill.
- Pat the shrimp dry with a paper towel for better seasoning and grilling.
Create the Marinade:
- In a bowl, mix the olive oil, lemon juice, minced garlic, chopped parsley, salt, and black pepper to create the marinade.
Marinate the Shrimp:
- Place the shrimp in a resealable bag or a shallow dish and pour the marinade over them. Ensure the shrimp is coated evenly.
- Marinate in the refrigerator for 20-30 minutes to allow the flavors to meld.
Prepare the Grill:
- Preheat your grill to medium-high heat (around 375°F to 400°F / 190°C to 204°C).
Thread the Shrimp:
- Thread the marinated shrimp onto the skewers, making sure they are evenly spaced and secure.
Grill the Shrimp Skewers:
- Place the skewers on the preheated grill and cook for about 2-3 minutes on each side until the shrimp turns pink and slightly charred.
Serve and Enjoy:
- Remove the shrimp skewers from the grill and serve immediately.
Shrimp Skewer Grilling Tips:
- If using metal skewers, consider double-skewering the shrimp to prevent them from spinning.
- For added flavor, baste the shrimp with any leftover marinade while grilling.
With these grilled shrimp skewers, you’ll have a delectable dish that’s perfect for summer gatherings or any time you’re craving a taste of the sea. Enjoy the succulent shrimp with your favorite dipping sauce or serve them alongside fresh salads for a light and flavorful meal.
Flavorful Grilled Vegetables
Grilled vegetables are a delightful addition to any meal, whether as a side dish, salad, or even a vegetarian main course. Their natural sweetness and smoky flavor make them a hit among both herbivores and carnivores alike. Follow our expert tips and use the recipe below to create grilled vegetables that will elevate your outdoor dining experience.
Ingredients:
| Item | Quantity |
|---|---|
| Assorted vegetables (bell peppers, zucchini, eggplant, asparagus, etc.) | 4 cups (sliced or cut into spears) |
| Olive oil | 2 tablespoons |
| Balsamic vinegar | 2 tablespoons |
| Garlic (minced) | 2 cloves |
| Fresh herbs (rosemary, thyme, or your preference) | 1 tablespoon (chopped) |
| Salt | 1/2 teaspoon |
| Black pepper | 1/4 teaspoon |
Instructions:
Prep the Vegetables:
- Wash and dry the vegetables thoroughly. Slice or cut them into even-sized pieces for even grilling.
Create the Marinade:
- In a bowl, whisk together the olive oil, balsamic vinegar, minced garlic, chopped herbs, salt, and black pepper to create the marinade.
Marinate the Vegetables:
- Place the vegetables in a large resealable bag or a shallow dish and pour the marinade over them. Toss the vegetables to coat them evenly.
- Marinate in the refrigerator for at least 30 minutes to let the flavors meld.
Prepare the Grill:
- Preheat your grill to medium-high heat (around 375°F to 400°F / 190°C to 204°C) for optimal grilling.
Grill the Vegetables:
- Place the vegetables on the grill, ensuring they are in a single layer.
- Grill for about 3-5 minutes on each side, or until they have grill marks and are tender-crisp.
Serve and Enjoy:
- Remove the grilled vegetables from the grill and serve them as a side dish or incorporate them into salads or pasta dishes.
Vegetable Grilling Tips:
- Use a grilling basket or skewers to prevent smaller vegetables from falling through the grates.
- Be mindful of the different grilling times for various vegetables, as some may cook faster than others.
With this flavorful grilled vegetables recipe, you’ll have a versatile and delightful addition to your grilling repertoire. Explore the vast array of seasonal produce and experiment with different marinades to suit your palate.
Smoked Pulled Pork
Smoked pulled pork is a time-honored tradition in barbecue culture, delivering tender and flavorful results that are perfect for gatherings and celebrations. Low and slow smoking turns a simple pork shoulder into a succulent masterpiece. Follow our expert tips and use the recipe below to create smoked pulled pork that will be the highlight of any barbecue feast.
Ingredients:
| Item | Quantity |
|---|---|
| Pork shoulder (bone-in or boneless) | 1 (5-7 pounds) |
| Yellow mustard | 1/4 cup |
| Pork dry rub (your favorite or see recipe below) | 1/2 cup |
| Apple juice or cider vinegar | 1 cup |
| BBQ sauce (optional, for serving) | As desired |
Pork Dry Rub:
| Item | Quantity |
|---|---|
| Brown sugar | 1/4 cup |
| Smoked paprika | 2 tablespoons |
| Garlic powder | 2 tablespoons |
| Onion powder | 1 tablespoon |
| Chili powder | 1 tablespoon |
| Cumin | 1 tablespoon |
| Salt | 1 tablespoon |
| Black pepper | 1 tablespoon |
Instructions:
Prep the Pork Shoulder:
- If the pork shoulder has excess fat, trim it to about 1/4-inch thickness for even cooking.
Apply the Mustard and Dry Rub:
- Brush the entire pork shoulder with a thin layer of yellow mustard. The mustard acts as a binder for the dry rub, helping it adhere to the meat.
- Generously coat the pork shoulder with the dry rub, ensuring an even covering.
Wrap and Refrigerate:
- Wrap the seasoned pork shoulder in plastic wrap or aluminum foil and refrigerate overnight to allow the flavors to penetrate the meat.
- Prepare the Smoker:
- Preheat your smoker to 225°F to 250°F (107°C to 121°C) for a slow and steady cooking process.
Smoke the Pork Shoulder:
- Place the pork shoulder on the smoker, fat side up, and close the lid.
- Smoke the pork for about 1.5 to 2 hours per pound, or until the internal temperature reaches 195°F to 203°F (90°C to 95°C).
Wrap and Rest:
- Remove the pork shoulder from the smoker and wrap it in foil. Let it rest for at least 1 hour to allow the juices to redistribute.
Pull and Serve:
- Use two forks to shred the smoked pork, discarding any excess fat.
- Serve the pulled pork on buns with your favorite BBQ sauce, coleslaw, or pickles.
Smoked Pulled Pork Grilling Tips:
- Consider using a disposable aluminum pan underneath the pork shoulder to catch the flavorful drippings.
- If your smoker has a water pan, fill it with apple juice or cider vinegar to maintain moisture during the smoking process.
With this smoked pulled pork recipe, you’ll be able to achieve tender, flavorful, and oh-so-satisfying meat that’s perfect for sandwiches, sliders, or even tacos. Prepare to receive rave reviews from your guests as they savor the mouthwatering goodness of your smoked masterpiece!
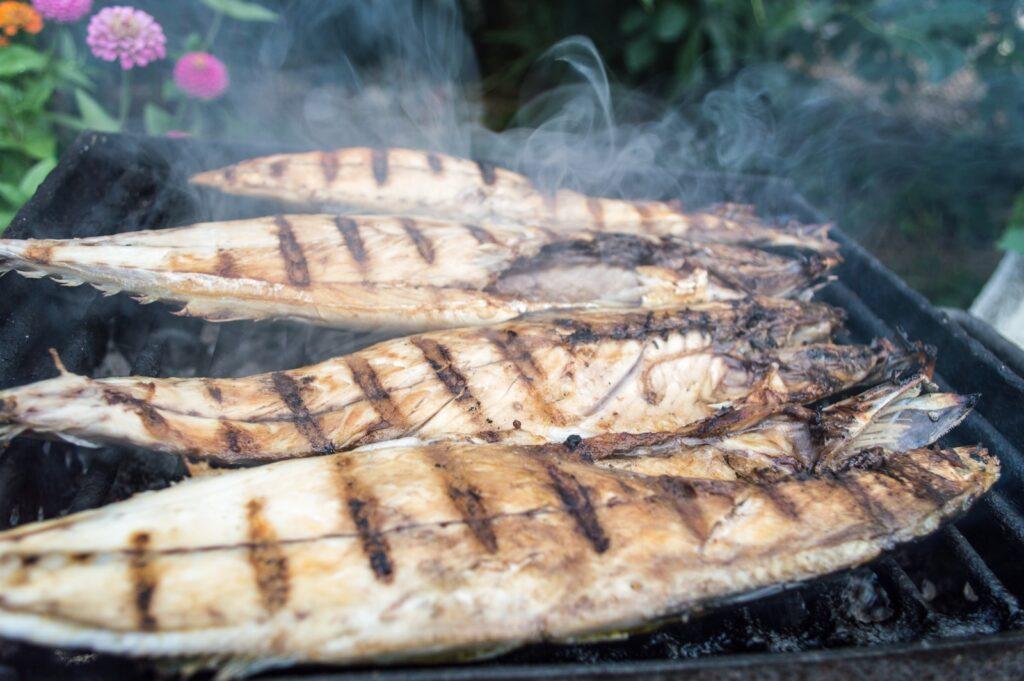
Grilled Whole Fish
Grilling a whole fish is an impressive and delicious way to showcase the natural flavors of the sea. With a beautiful presentation and smoky taste, a grilled whole fish is a show-stopping centerpiece for any seafood lover’s table. Follow our expert tips and use the recipe below to create a grilled whole fish that will have your guests in awe.
Ingredients:
| Item | Quantity |
|---|---|
| Whole fish (snapper, trout, branzino, or your preference) | 1 (about 2 pounds) |
| Olive oil | 2 tablespoons |
| Lemon juice | 2 tablespoons |
| Fresh herbs (parsley, dill, or your preference) | 2 tablespoons (chopped) |
| Garlic (minced) | 2 cloves |
| Salt | 1/2 teaspoon |
| Black pepper | 1/4 teaspoon |
| Lemon slices and fresh herbs for garnish | As desired |
Instructions:
Prep the Fish:
- Clean the fish thoroughly, removing any scales, guts, and gills.
- Make diagonal slits on both sides of the fish to help it cook evenly and allow the flavors to penetrate.
Create the Marinade:
- In a bowl, mix the olive oil, lemon juice, minced garlic, chopped herbs, salt, and black pepper to create the marinade.
Marinate the Fish:
- Place the fish in a shallow dish or a large resealable bag and pour the marinade over it, making sure it coats both the inside and outside of the fish.
- Marinate in the refrigerator for at least 30 minutes to allow the flavors to infuse.
Prepare the Grill:
- Preheat your grill to medium-high heat (around 375°F to 400°F / 190°C to 204°C).
Grill the Whole Fish:
- Place the fish on the grill grates and cook for about 5-7 minutes on each side, depending on the thickness of the fish. Use a fish spatula or two sturdy spatulas to carefully flip the fish.
Check for Doneness:
- The fish is done when the flesh easily flakes off and is opaque all the way through. Avoid overcooking to maintain its juiciness.
Serve and Garnish:
- Transfer the grilled whole fish to a serving platter.
- Garnish with lemon slices and fresh herbs for an elegant presentation.
Whole Fish Grilling Tips:
- Ensure the grill grates are clean and well-oiled before placing the fish to prevent sticking.
- If the fish is too large for your grill, you can cook it on a cedar plank or use a fish basket.
With this grilled whole fish recipe, you’ll be able to create a stunning and flavorful seafood masterpiece that will impress your guests and elevate your grilling skills to new heights.
Tasty Grilled Lamb Chops
Grilled lamb chops are a delectable indulgence that showcases the rich and meaty flavors of lamb. With the right seasonings and grilling technique, you can achieve tender and succulent lamb chops that are fit for any occasion. Follow our expert tips and use the recipe below to create grilled lamb chops that will have everyone savoring each flavorful bite.
Ingredients:
| Item | Quantity |
|---|---|
| Lamb chops (loin or rib chops) | 8 pieces (about 2 pounds) |
| Olive oil | 2 tablespoons |
| Fresh rosemary (chopped) | 2 tablespoons |
| Garlic (minced) | 2 cloves |
| Lemon zest | 1 tablespoon |
| Salt | 1/2 teaspoon |
| Black pepper | 1/4 teaspoon |
Instructions:
Prep the Lamb Chops:
- Trim excess fat from the lamb chops, leaving a thin layer for added flavor during grilling.
- Pat the chops dry with a paper towel for better seasoning and searing.
Create the Marinade:
- In a bowl, whisk together the olive oil, chopped rosemary, minced garlic, lemon zest, salt, and black pepper to create the marinade.
Marinate the Lamb Chops:
- Place the lamb chops in a resealable bag or a shallow dish and pour the marinade over them. Ensure each chop is coated evenly.
- Marinate in the refrigerator for at least 30 minutes, allowing the flavors to meld.
Prepare the Grill:
- Preheat your grill to medium-high heat (around 375°F to 400°F / 190°C to 204°C) for a perfect sear.
Grill the Lamb Chops:
- Place the lamb chops on the preheated grill and cook for about 3-4 minutes on each side for medium-rare. Adjust the cooking time based on your desired level of doneness.
Rest and Serve:
- Remove the lamb chops from the grill and let them rest for a few minutes before serving.
Lamb Chop Grilling Tips:
- For added tenderness, consider marinating the lamb chops for a longer time, up to 24 hours, in the refrigerator.
- Allow the lamb chops to come to room temperature for about 20-30 minutes before grilling for more even cooking.
With this tasty grilled lamb chops recipe, you’ll be able to create a succulent and savory dish that’s perfect for special occasions or any time you want to treat yourself to a gourmet experience. Enjoy the rich flavors of perfectly grilled lamb chops and savor the joy of indulgence.
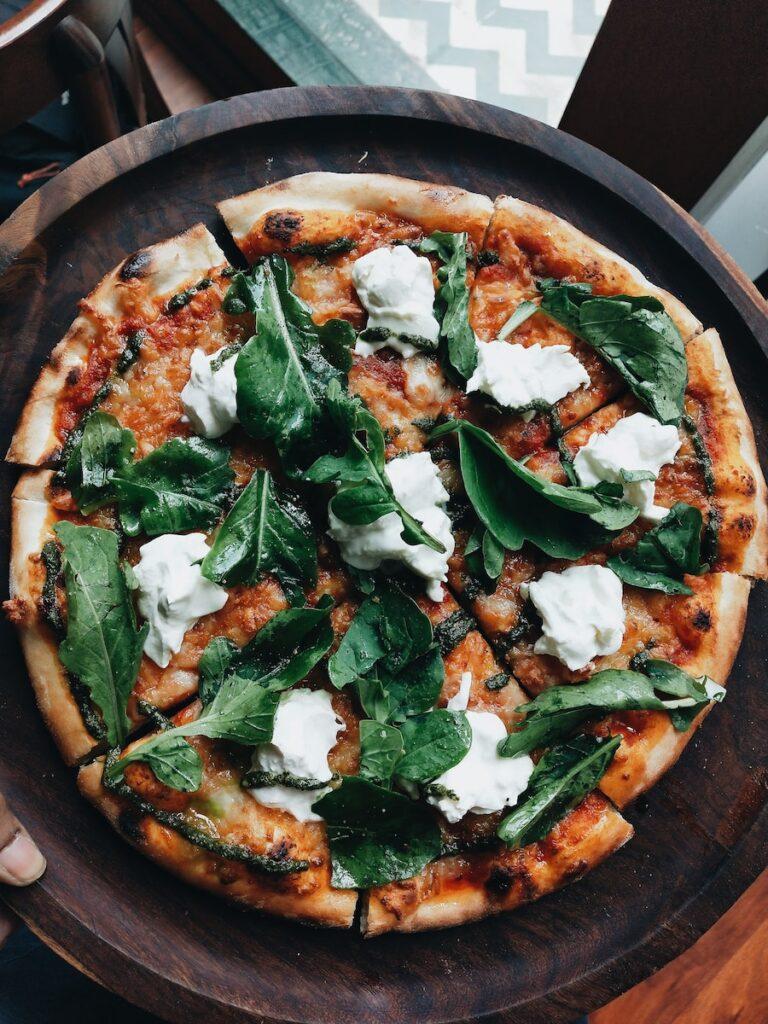
Grilled Pizza
Grilled pizza is a delightful twist on the classic Italian dish, and it’s an excellent way to enjoy the smoky flavors of the grill with your favorite pizza toppings. The combination of a crispy crust and charred toppings creates a mouthwatering experience that will leave you wanting more. Follow our expert tips and use the recipe below to create grilled pizza that will have everyone asking for seconds.
Ingredients:
| Item | Quantity |
|---|---|
| Pizza dough (store-bought or homemade) | 1 pound |
| Olive oil | 2 tablespoons |
| Tomato sauce or pizza sauce | 1/2 cup |
| Mozzarella cheese (shredded) | 1 cup |
| Pizza toppings (pepperoni, mushrooms, bell peppers, etc.) | As desired |
| Fresh basil leaves (optional) | A handful |
| Red pepper flakes (optional) | As desired |
Instructions:
Prepare the Pizza Dough:
- If using store-bought dough, follow the instructions on the package for thawing and proofing.
- If using homemade dough, ensure it’s at room temperature before grilling.
Roll and Stretch the Dough:
- On a floured surface, roll or stretch the pizza dough to your desired thickness and size. Aim for a thickness of about 1/4 inch.
Prep the Grill and Dough:
- Preheat your grill to medium-high heat (around 375°F to 400°F / 190°C to 204°C).
- Brush one side of the pizza dough with olive oil to prevent sticking to the grill.
Grill the Pizza Dough:
- Place the oiled side of the dough directly onto the grill grates.
- Grill the dough for about 2-3 minutes or until it has grill marks and is slightly charred. Brush the top side with olive oil before flipping.
Add Sauce and Toppings:
- Flip the grilled dough and quickly add the tomato sauce, spreading it evenly.
- Sprinkle the shredded mozzarella cheese and your desired pizza toppings over the sauce.
Continue Grilling:
- Close the grill lid and continue cooking for another 5-7 minutes, or until the cheese is melted, and the crust is crispy.
Garnish and Serve:
- Remove the grilled pizza from the grill and garnish with fresh basil leaves and red pepper flakes, if desired.
- Slice and serve immediately while it’s hot and gooey.
Pizza Grilling Tips:
- Have all your pizza toppings prepared and within reach before placing the dough on the grill, as the cooking process is quick.
- Consider using a pizza stone or pizza peel if you prefer a more authentic pizzeria-style crust.
With this grilled pizza recipe, you’ll be able to create a delectable and customizable pizza right on your grill. Gather family and friends for a pizza party and enjoy the wonderful flavors of freshly grilled pies.
Succulent Grilled Pineapple Dessert
Grilled pineapple is a luscious and refreshing dessert that adds a tropical twist to your outdoor gatherings. With its caramelized sweetness and smoky aroma, this succulent grilled pineapple dessert is a perfect way to end any meal. Follow our expert tips and use the recipe below to create a dessert that will have everyone raving about its delightful simplicity.
Ingredients:
| Item | Quantity |
|---|---|
| Fresh pineapple (peeled and cored) | 1 pineapple |
| Brown sugar | 1/4 cup |
| Ground cinnamon | 1 teaspoon |
| Vanilla ice cream | For serving (optional) |
| Fresh mint leaves | For garnish (optional) |
Instructions:
Prep the Pineapple:
- Cut off the top and bottom of the pineapple, then slice off the skin, ensuring all the prickly eyes are removed.
- Core the pineapple and cut it into thick slices or wedges.
Create the Caramelizing Mixture:
- In a bowl, mix the brown sugar and ground cinnamon to create the caramelizing mixture.
Coat the Pineapple:
- Lightly brush the pineapple slices with the caramelizing mixture on both sides, ensuring they are evenly coated.
Prepare the Grill:
- Preheat your grill to medium-high heat (around 375°F to 400°F / 190°C to 204°C) for a quick caramelization.
Grill the Pineapple:
- Place the pineapple slices on the preheated grill and cook for about 2-3 minutes on each side, or until grill marks appear and the pineapple is tender.
Serve and Enjoy:
- Remove the grilled pineapple from the grill and serve it as a standalone dessert or with a scoop of vanilla ice cream.
- Garnish with fresh mint leaves for an added touch of freshness.
Pineapple Grilling Tips:
- You can sprinkle the grilled pineapple with a pinch of sea salt for a delightful contrast to the sweetness.
With this succulent grilled pineapple dessert recipe, you’ll have a simple yet indulgent treat that captures the flavors of summer. Impress your guests with this tropical delight and savor the sweet and smoky goodness of grilled pineapple.
Wrapping it Up
Congratulations, grill master! You have now learned 11 must-know recipes, tips, and techniques to elevate your grilling game. From succulent steaks and tender chicken to delectable desserts, your outdoor cooking skills are sure to impress family and friends. Embrace the art of grilling, experiment with flavors, and create unforgettable culinary experiences that will keep everyone coming back for more.
Author

Last updated: October 23, 2023